Guide and picks
Evaporative cooler setup guide
Two things ruin the first hour with a new cooler, and both are setup rather than the machine.
By Sawyer V. · Published
The short answer
Assemble it, fill the tank, then run the pump with the fan off for several minutes so the media is fully saturated before any air passes through it. Then open a window or door on the far side of the room — an evaporative cooler adds moisture and needs a path out, or the air saturates and the cooling stops. Those two steps account for most first-run disappointment.
Fan & Frost earns a commission when you buy through our links, at no cost to you. It never changes a ranking, and we say so when the right answer is the cheaper unit or nothing at all. Full disclosure · How we pick.
At a glance
The picks, ranked
Tap any row to jump to the full reasoning. Prices are live from Amazon where we have them, and read “check price” where we don’t — never a number we cannot verify today.
| # | Product | Best for | Price |
|---|---|---|---|
| 1 | Simplest setup Honeywell CL25AE Indoor Evaporative Cooler 25.4 lb with a 6.6 gallon tank and a 7.5 hour timer — light enough to carry to a tap and fill. | A first evaporative cooler, in a single room | |
| 2 | Best media to prime Honeywell CO60PM Indoor/Outdoor Evaporative Cooler Triple-sided honeycomb media and a 15.9 gallon tank with continuous hookup, at 2,697 CFM on 220 W. | A large space, where the priming step matters most | |
| 3 | 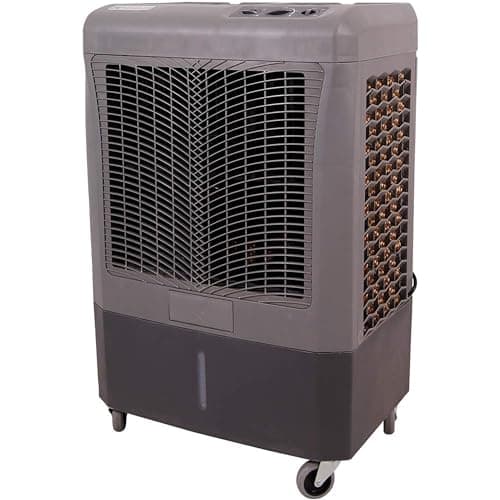 Best hookup setup Hessaire MC37M Mobile Evaporative Cooler 3,100 CFM on 250 W with a 10.3 gallon tank and continuous hookup — set it up once and stop thinking about water. | A garage or workshop where it will run all day | |
| — | 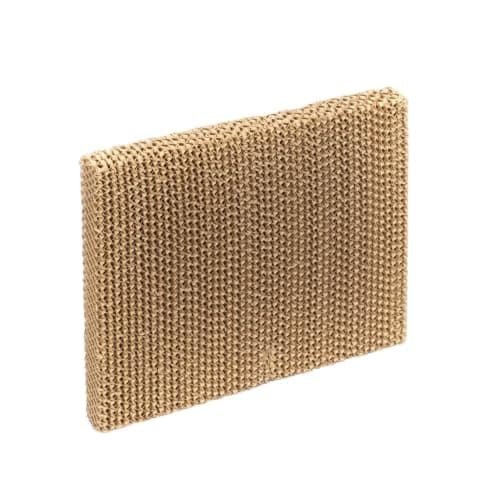 Check this before the first run Hessaire CP370 Media Pad Set 21 x 23 inch media for the 3,100 CFM Hessaire chassis — worth inspecting before you assume the machine is at fault. | A cooler that has been in storage, or a second-hand one |
Evaporative coolers arrive mostly assembled and the instructions are usually adequate. What the instructions rarely emphasise is the two things that determine whether the first hour is impressive or disappointing.
Step one
Assembly, and what to check
- Fit the castors or feet before anything else. Doing it after the tank is full is a different job entirely.
- Check the media is seated properly. Pads shift in transit, and a pad sitting slightly out of its frame leaves a bypass gap — air goes around rather than through, and the cooler barely works.
- Confirm the pump is connected and submerged. The inlet must be below the minimum water line, and the outlet hose must be attached to the distributor.
- Check the distributor holes are clear on a second-hand or stored unit. On a new one they should be.
- Fit any louvre or grille the right way round — they direct airflow and fitting one reversed is easy and unhelpful.
Step two
Prime the media before you run the fan
This is the step that gets skipped, and it produces the most common first-run complaint: “it just blows air, it does not feel cool”.
Evaporative cooling happens at a wet pad. Air passing over dry media does nothing except move. A rigid honeycomb pad takes several minutes to saturate fully, and a triple-sided one takes longer.
Fill the tank, switch the pump on with the fan off, and wait. Watch the media face — it should darken evenly, edge to edge. Only when the whole face is wet should you start the fan.
If it wets in a stripe with dry media either side, stop. The distributor is partly blocked or the pump is under-delivering, and running the fan will simply push air through the dry part where there is no resistance. The fix.
This one is not a DIY job
The airflow path is not optional. An evaporative cooler works by putting water vapor into the air, and that vapor needs somewhere to go.
In a sealed room the humidity climbs, the air’s remaining capacity to absorb moisture falls, and the cooling effect declines toward zero — while the machine keeps running and keeps adding water.
Open a window or door on the opposite side of the room from the cooler, so there is a route: drier air in, humidified air out.
This is why these machines suit garages with the door up, workshops, patios and sunrooms so well, and why they fail in a closed-up house.
Step three
Where to put it
- Near where fresh air enters, not near where it leaves. The cooler should be drawing the driest available air, which is the incoming air.
- Aimed along the longest axis of the space, so the cooled air has the most distance to work with.
- Not pointed at the open door. Blowing cooled air straight out is a common placement error and an expensive one.
- On a level surface that can take water. Pumps and tanks occasionally drip, and a cooler on a wooden floor deserves a tray.
- Raised, if you can. Cooled air is denser and sinks, so launching it above head height covers more of the occupied zone.
First run
What to expect, and what to check
A new cooler may smell faintly for the first hour. New media and plastic have their own odor, and it should fade. A musty smell is different and means the media is biologically active — on a new unit, that would be unusual.
Check the pad face after twenty minutes of running with the pump on. Still evenly wet, edge to edge? Good. Dry patches developing? The distributor or pump is not keeping up.
Check the tank level after an hour. It should have dropped noticeably on a hot dry day. If it has barely moved, very little is evaporating — which means very little cooling, and usually means the air is too humid for the technology. Water use is the cooling.
Feel the air at the outlet, not across the room. The temperature drop happens at the pad, and it dissipates as the air mixes. Judging the machine from ten feet away on the first run is judging your room, not the cooler.
Habits
Two things to start doing immediately
Run the fan without the pump for the last ten to fifteen minutes of every session. This dries the media before it sits, which prevents both the mineral crust and the biological growth that produce the smell people complain about in month two.
Drain the tank whenever it will be idle for more than a day. Warm standing water is the origin of essentially every cooler smell.
Starting both from day one is far easier than fixing the consequences later. Troubleshooting if you did not.
Say the unwelcome thing
Do not judge a new cooler on its first ten minutes.
The most common reason a cooler gets returned is a first run done wrong, and the machine is usually fine.
A dry pad produces no cooling at all. A room with no air path saturates within minutes and the effect stops. Both feel like a faulty product and neither is.
Give it a proper first run: prime the media with the pump alone until the whole face is wet, open something on the far side of the room, then start the fan and feel the air at the outlet.
If after that the tank has barely dropped in an hour, the problem is not setup — it is your climate, and that is worth knowing before the return window closes.
In full
Every pick, and what is wrong with it
Published specifications only, each linked to the page it came from. Where a manufacturer publishes nothing, the row says so — we do not fill blanks in.
1. Simplest setup
Honeywell CL25AE Indoor Evaporative Cooler
Honeywell · model CL25AE
25.4 lb with a 6.6 gallon tank and a 7.5 hour timer — light enough to carry to a tap and fill.
25.4 lb is the specification that makes setup easy. You carry it to a tap, fill it, and carry it back — no hose, no plumbing, no decision about hookups.
6.6 gallons paired with a 7.5 hour timer is a coherent design: the tank and a session are sized to end at roughly the same time.
52 to 60 dBA is the quietest published figure in the category, and 33 feet of throw is enough for a room.
The honest weakness is efficiency: 235 W for 764 CFM, about 26¢ for a six-hour session.
What’s wrong with it
764 CFM on 235 W is the weakest air-per-watt here, and the small tank needs refilling more often.
Running cost — CL25AE
| Nameplate power | 235 W | manufacturer's published figure |
|---|---|---|
| Energy, 8-hour night | 1.88 kWh | 235 ÷ 1000 × 8 |
| Cost per hour | 4.3¢ | at 18.34¢/kWh |
| Cost per 8-hour night | 34¢ | on the highest speed |
| Cost per 30 nights | $10 | 56.4 kWh |
Rate: 18.34¢/kWh, the US average residential price for June 2026 (EIA Electric Power Monthly, Table 5.3). Yours will differ — swap it in: (watts ÷ 1000) × hours × your rate.
| Air delivery | 764 CFM |
|---|---|
| Power | 235 W |
| Water tank | 6.6 gallons |
| Air throw | 33 ft |
| Noise | 52-60 dBA |
| Speeds | 3, oscillating louvers |
| Timer | Up to 7.5 hours |
| Dimensions | 18.9 x 14.6 x 33.3 in |
| Weight | 25.4 lb |
| Manufacturer coverage claim | 466 sq ft |
| Warranty | 1 year |
Every figure above is from Honeywell Air Comfort product page, CL25AE. Blanks are shown as “not published” rather than filled in.
2. Best media to prime
Honeywell CO60PM Indoor/Outdoor Evaporative Cooler
Honeywell · model CO60PM
Triple-sided honeycomb media and a 15.9 gallon tank with continuous hookup, at 2,697 CFM on 220 W.
Triple-sided honeycomb means three faces of rigid media rather than one. More media area, better wetting, and it rinses rather than compacting.
It also means priming matters more. Three faces take longer to saturate than one, and running the fan before they are wet is the classic first-run mistake.
15.9 gallons with continuous hookup — and if you are plumbing it in, do that before the first fill rather than after.
2,697 CFM on 220 W, about 24¢ for a six-hour session, with a 30-foot throw.
What’s wrong with it
Three media faces take longer to prime, and 15.9 gallons is over 130 lb of water — you fill this in place.
Running cost — CO60PM
| Nameplate power | 220 W | manufacturer's published figure |
|---|---|---|
| Energy, 8-hour night | 1.76 kWh | 220 ÷ 1000 × 8 |
| Cost per hour | 4.0¢ | at 18.34¢/kWh |
| Cost per 8-hour night | 32¢ | on the highest speed |
| Cost per 30 nights | $9.68 | 52.8 kWh |
Rate: 18.34¢/kWh, the US average residential price for June 2026 (EIA Electric Power Monthly, Table 5.3). Yours will differ — swap it in: (watts ÷ 1000) × hours × your rate.
| Air delivery | 2,697 CFM |
|---|---|
| Power | 220 W |
| Water tank | 15.9 gallons, continuous hookup |
| Air throw | 30 ft |
| Noise | 61-65 dBA |
| Speeds | 3, with oscillation |
| Pads | Triple-sided honeycomb |
| Dimensions | 27.6 W x 18.3 D x 40 H in |
| Weight | 39.2 lb |
| Manufacturer coverage claim | 1,643 sq ft |
| Warranty | 1 year |
Every figure above is from Honeywell Air Comfort product page, CO60PM. Blanks are shown as “not published” rather than filled in.
3. Best hookup setup
Hessaire MC37M Mobile Evaporative Cooler
Hessaire · model MC37M
3,100 CFM on 250 W with a 10.3 gallon tank and continuous hookup — set it up once and stop thinking about water.
If the cooler will run for long sessions, spend the extra ten minutes at setup connecting the hookup. It changes the machine from something you tend to something that runs.
A float valve also keeps the water level constant, which avoids the full-to-nearly-empty cycle that concentrates minerals and precipitates them onto the pump and distributor.
3,100 CFM on 250 W is the best air-per-watt in the category — about 37¢ for an eight-hour day.
Set the hose route where it will not be walked on or driven over, and check the valve seats properly before leaving it unattended.
What’s wrong with it
40 lb, no published noise rating, and a hose connection is a setup step a tank-only unit does not have.
Running cost — MC37M
| Nameplate power | 250 W | manufacturer's published figure |
|---|---|---|
| Energy, 8-hour night | 2.00 kWh | 250 ÷ 1000 × 8 |
| Cost per hour | 4.6¢ | at 18.34¢/kWh |
| Cost per 8-hour night | 37¢ | on the highest speed |
| Cost per 30 nights | $11 | 60.0 kWh |
Rate: 18.34¢/kWh, the US average residential price for June 2026 (EIA Electric Power Monthly, Table 5.3). Yours will differ — swap it in: (watts ÷ 1000) × hours × your rate.
| Air delivery | 3,100 CFM |
|---|---|
| Power | 250 W / 2.4 A |
| Water tank | 10.3 gallons, continuous hookup capable |
| Dimensions | 24 L x 16 W x 38 H in |
| Weight | 40 lb |
| Pads | Industrial-grade cooling pads |
| Coverage claim | Not published on the product page |
Every figure above is from Hessaire product page, MC37M. Blanks are shown as “not published” rather than filled in.
Skip this one
Hessaire CP370 Media Pad Set
Hessaire · model CP370
21 x 23 inch media for the 3,100 CFM Hessaire chassis — worth inspecting before you assume the machine is at fault.
Listed for a specific case: setting up a cooler that has been stored over winter, or one bought second-hand.
A pad that was put away wet spends the off-season as a damp, dark, sealed environment. It comes out crusted with mineral scale, biologically active, or both — and no amount of correct setup fixes that.
Inspect before the first run: does it wet evenly across its whole face? Is there hard crust that will not rinse? Does it smell? The full test.
21 by 23 inches for the MC37, M150 and MFC3600. Measure before ordering.
What’s wrong with it
Not needed on a new cooler, and Hessaire publishes no replacement interval to judge against.
Running cost
Hessaire does not publish a wattage for the CP370, so we cannot calculate what it costs to run. We are not going to estimate one. If Hessaire publishes a nameplate figure, this block will show the arithmetic.
| Fits | MC37, M150 and MFC3600 (3,100 CFM) coolers |
|---|---|
| Pad size | 21 x 23 in |
| Type | Replacement media pad set |
| Replacement interval | Not published by the manufacturer |
Every figure above is from Hessaire parts page, CP370 media pad set. Blanks are shown as “not published” rather than filled in.
We are not linking a buy button for this one. If you want to look at it anyway, it is easy enough to find — but we would rather send you to something that fits your room.
Questions people actually ask
Frequently asked
How do I set up an evaporative cooler for the first time?
Assemble it and check the media is seated with no bypass gaps, fill the tank, then run the pump with the fan off until the whole pad face is evenly wet. Only then start the fan — and open a window or door on the far side of the room.
Why does my new evaporative cooler just blow air?
Almost always a dry pad. Evaporative cooling happens at a wet pad, and rigid honeycomb media takes several minutes to saturate — longer on a triple-sided unit. Run the pump alone until the face darkens evenly before starting the fan.
Does an evaporative cooler need a window open?
Yes, and it is not optional. The machine adds water vapor to the air, and in a sealed room the humidity climbs until the air cannot absorb more and the cooling stops. Open something on the opposite side from the cooler.
Where should I place an evaporative cooler?
Near where fresh air enters rather than where it leaves, aimed along the longest axis, not pointed at the open door, on a level surface that can take a drip, and raised above head height if possible since cooled air sinks.
How do I know if my evaporative cooler is working?
Feel the air at the outlet rather than across the room, check the pad is still evenly wet after twenty minutes, and check the tank level after an hour. If it has barely dropped, very little is evaporating — which means very little cooling. Water use is the cooling.
What habits should I start from day one?
Run the fan without the pump for the last ten to fifteen minutes of every session so the media dries before it sits, and drain the tank whenever the cooler will be idle for more than a day. Both prevent the smell people report in month two.
Sources
Where these numbers came from
- Honeywell CL25AE product page — 764 CFM, 235 W, 6.6 gal tank, 25.4 lb, 33 ft throw, 7.5 h timer
- Honeywell CO60PM product page — 2,697 CFM, 220 W, triple-sided honeycomb media, 15.9 gal tank
- Hessaire MC37M product page — 3,100 CFM, 250 W, 10.3 gal tank, continuous hookup
- EIA Electric Power Monthly, Table 5.3 — electricity rate
Read next
Where to go from here
Back to Evaporative Coolers, or read how we pick.